Replacing your roof represents one of the most significant home improvement investments you’ll make. For Lanark County homeowners preparing for this project, understanding what to expect throughout the process reduces stress and ensures better outcomes. This guide walks you through each phase of a professional roof replacement, from initial consultation to final inspection.
Phase 1: Initial Consultation and Assessment
Every quality roof replacement begins with a thorough assessment of your existing roof and a detailed discussion of your needs and preferences.
The Inspection Process
A qualified roofing professional will examine your current roof’s condition, identifying any structural concerns that need addressing. This includes checking the decking for rot or damage, evaluating the attic for ventilation and other issues as a necessary part of the inspection, and noting any areas where previous repairs or shortcuts could impact the new installation.
The inspector should also measure your roof accurately, accounting for pitches, valleys, dormers, and other architectural features that affect material requirements and labour estimates.
Material Selection Discussion
During the consultation, you’ll discuss material options suitable for your home and budget. Whether you’re considering metal roofing, asphalt shingles, or flat roofing systems, your contractor should explain the pros and cons of each option in the context of Lanark County’s climate.
Colour samples, warranty information, and manufacturer specifications help you make an informed choice. Don’t hesitate to ask questions—this decision affects your home for decades.
Phase 2: Estimate and Contract
After the assessment, you’ll receive a detailed estimate outlining all aspects of the project. Understanding what this document should contain protects your interests.
What the Estimate Should Include
A professional estimate specifies materials by manufacturer and product line, not just generic descriptions. It should detail the scope of work including tear-off of existing materials, decking repairs if needed, underlayment specifications, and all flashing and trim work.
Review estimates and contracts carefully before signing.
Phase 3: Pre-Installation Preparation
Once you’ve signed the contract, preparation for installation day begins.
Scheduling and Timeline
Your contractor will provide an estimated start date and project duration. Weather contingencies factor significantly into roofing schedules in our region. Expect flexibility—professional contractors won’t install roofing materials in conditions that compromise quality.
For most residential roof replacements in Lanark County, plan for one to three days of active work depending on roof size and complexity.
Preparing Your Property
Before the crew arrives, you’ll need to prepare your property. Move vehicles away from the work area to avoid damage from falling debris. Clear items from your yard near the house, including patio furniture, grills, and planters.
Inside, vibrations from roofing work can dislodge items from walls and shelves. Secure or remove fragile items, and expect some dust to infiltrate through attic access points despite protective measures.
If you have pets, arrange for them to stay elsewhere during the noisiest work periods. The unfamiliar sounds and activity can cause significant stress for animals.
Phase 4: Tear-Off Day
The first day of most roof replacements involves removing the existing roofing materials. This phase is typically the loudest and most disruptive.
Removing Old Materials
Crews systematically strip existing shingles, underlayment, and flashing. They’ll inspect the decking beneath, identifying any areas requiring repair or replacement. Damaged plywood or OSB must be replaced before new roofing materials go on.
Your contractor should have discussed potential decking repair costs during the estimate phase. Some decay isn’t visible until old materials come off, so budget flexibility helps if unexpected repairs surface.
Debris Management
Professional crews use tarps and specialized containers to manage debris, protecting your landscaping and making cleanup efficient. Materials go into disposal containers for proper handling—reputable contractors don’t leave debris scattered across your property.
Phase 5: Installation Process
With the old roof removed and any necessary repairs completed, installation of your new roofing system begins.
Underlayment and Ice Shield
Proper underlayment provides a critical secondary water barrier. In Lanark County, ice and water shield membrane should extend from the eaves up the roof deck to at least 24 inches past the interior wall line. This protection addresses ice dam concerns common in our climate.
Synthetic underlayment covers the remaining deck surface, creating a complete protective layer beneath your finish roofing.
Flashing Installation
New flashing around chimneys, vents, skylights, and where the roof meets walls prevents water intrusion at these vulnerable points. Quality chimney flashing and proper sealing around all roof penetrations significantly impact long-term roof performance.
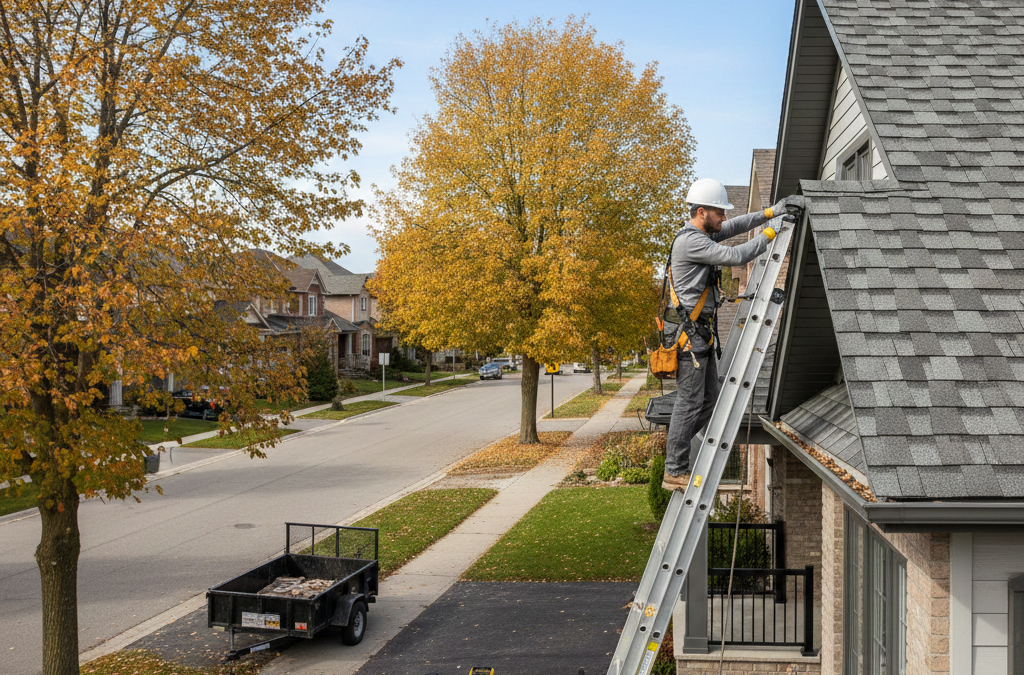
Roofing Material Application
Whether installing metal panels, asphalt shingles, or membrane systems, your crew follows manufacturer specifications and building code requirements. Proper nailing patterns, overlap dimensions, and sealing techniques determine how well your roof withstands Lanark County’s demanding weather.
Phase 6: Quality Inspection and Cleanup
As installation wraps up, attention turns to ensuring everything meets quality standards and your property is returned to pre-project condition.
Final Inspection
Your contractor should conduct a thorough inspection of the completed work, verifying proper installation of all components. Many homeowners appreciate walking through this inspection together, learning about their new roof and understanding what to watch for in coming years.
Site Cleanup
Professional cleanup includes magnetic sweeping of your yard and driveway to collect stray nails—an essential safety step often overlooked by less conscientious contractors. Debris removal and site restoration should leave your property looking better than before the project began.
Phase 7: Documentation and Warranty
Your roof replacement investment deserves proper documentation for protection and future reference.
Warranty Registration
Most roofing manufacturers require registration to activate warranty coverage. Ensure your contractor handles this registration and provides you with copies of all warranty documents. The warranty terms vary significantly between products—understand what’s covered and for how long.
Maintaining Your Records
Keep all project documentation including the contract, permit records, warranty registrations, and any inspection reports. These documents prove valuable when selling your home, filing insurance claims, or addressing any warranty issues.
Choosing the Right Contractor
The quality of your roof replacement depends largely on the contractor you choose. Verify WSIB coverage and liability insurance before signing any contract. Check references from recent local projects and confirm the contractor holds any manufacturer certifications relevant to your chosen materials.
A reputable local roofing contractor understands regional building codes, climate considerations, and material performance in Lanark County conditions. This local expertise translates to better results and responsive service if issues arise.